VIDEO CLIPS 6c
Shaolin in Portugal 2010 (Cont)
 Shaolin in Portugal 2010 -- Shaolin 02
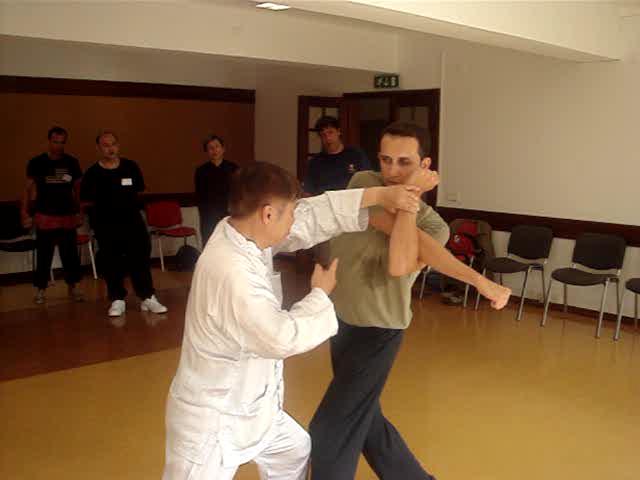
Usefulness of the Boiw-Arrow Stance -- Part 1
Shaolin in Portugal 2010 -- Shaolin 02
Usefulness of the Boiw-Arrow Stance -- Part 1Usefulness of the Boiw-Arrow Stance -- Part 2
Usefulness of the Boiw-Arrow Stance -- Part 3
Usefulness of the Boiw-Arrow Stance -- Part 4
Usefulness of the Boiw-Arrow Stance -- Part 5
Usefulness of the Boiw-Arrow Stance -- Part 6
Usefulness of the Boiw-Arrow Stance -- Part 7
Usefulness of the Boiw-Arrow Stance -- Part 8
Usefulness of the Boiw-Arrow Stance -- Part 9
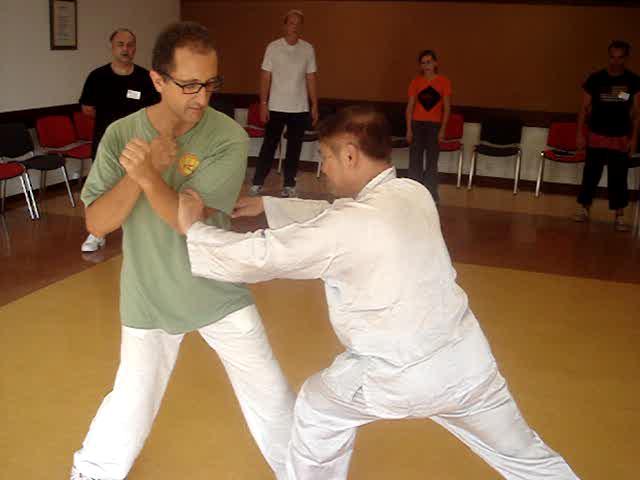
Keeping a Boxer at Bay with your Guard Hand -- Part 1
Keep a Boxer at Bay with your Guard Hand -- Part 2
Keep a Boxer at Bay with your Guard Hand -- Part 3
Keep a Boxer at Bay with your Guard Hand -- Part 4
Keep a Boxer at Bay with your Guard Hand -- Part 5
Keep a Boxer at Bay with your Guard Hand -- Part 6
Keep a Boxer at Bay with your Guard Hand -- Part 7
Keep a Boxer at Bay with your Guard Hand -- Part 8
Keep a Boxer at Bay with your Guard Hand -- Part 9
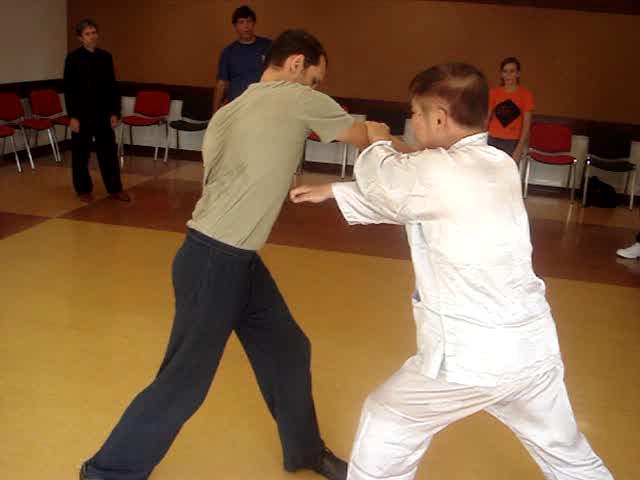
In-Gate and Out-Gate in Defence -- Part 1
In-Gate and Out-Gate in Defence -- Part 2
In-Gate and Out-Gate in Defence -- Part 3
In-Gate and Out-Gate in Defence -- Part 4
In-Gate and Out-Gate in Defence -- Part 5
In-Gate and Out-Gate in Defence -- Part 6
In-Gate and Out-Gate in Defence -- Part 7
In-Gate and Out-Gate in Defence -- Part 8
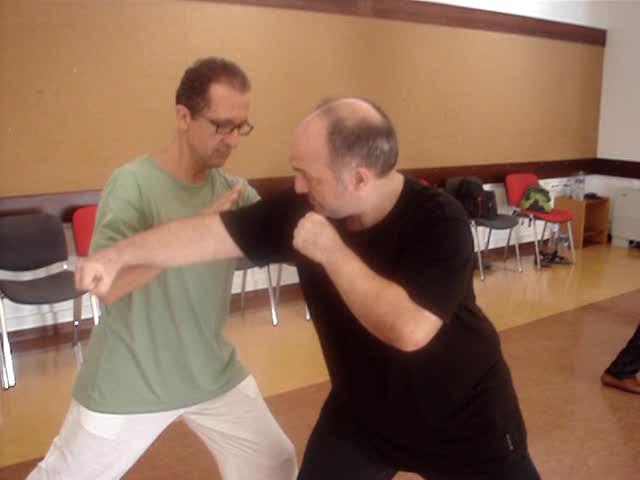
The Tactic of Cover and Strike -- Part 1
The Tactic of Cover and Strike -- Part 2
The Tactic of Cover and Strike -- Part 3
The Tactic of Cover and Strike -- Part 4
 The Tactic of Cover and Strike -- Part 5
The Tactic of Cover and Strike -- Part 6
The Tactic of Cover and Strike -- Part 7
The Tactic of Cover and Strike -- Part 8
Countering at Points 3, 2 and 1 - Part 1
Countering at Points 3, 2 and 1 - Part 2
Countering at Points 3, 2 and 1 - Part 3
Countering at Points 3, 2 and 1 - Part 4
Countering at Points 3, 2 and 1 - Part 5
Countering at Points 3, 2 and 1 - Part 6
Countering at Points 3, 2 and 1 - Part 7
Countering at Points 3, 2 and 1 - Part 8
Countering at Points 3, 2 and 1 - Part 9
Countering at Points 3, 2 and 1 - Part 10
Taking the Initiative to Attack a Boxer -- Part 1
Taking the Initiative to Attack a Boxer -- Part 2
Taking the Initiative to Attack a Boxer -- Part 3
Taking the Initiative to Attack a Boxer -- Part 4
Taking the Initiative to Attack a Boxer -- Part 5
Taking the Initiative to Attack a Boxer -- Part 6
Taking the Initiative to Attack a Boxer -- Part 7
Taking the Initiative to Attack a Boxer -- Part 8
Taking the Initiative to Attack a Boxer -- Part 9
Covering your Opponent to Ensure Safety First -- Part 1
Covering your Opponent to Ensure Safety First -- Part 2
Covering your Opponent to Ensure Safety First -- Part 3
Covering your Opponent to Ensure Safety First -- Part 4
Covering your Opponent to Ensure Safety First -- Part 5
Covering your Opponent to Ensure Safety First -- Part 6
Covering your Opponent to Ensure Safety First -- Part 7
 Covering your Opponent to Ensure Safety First -- Part 8
Usefulness and Subtlety of Body Movement -- Part 1
Usefulness and Subtlety of Body Movement -- Part 2
Usefulness and Subtlety of Body Movement -- Part 3
Usefulness and Subtlety of Body Movement -- Part 4
Usefulness and Subtlety of Body Movement -- Part 5
Usefulness and Subtlety of Body Movement -- Part 6
Usefulness and Subtlety of Body Movement -- Part 7
Usefulness and Subtlety of Body Movement -- Part 8
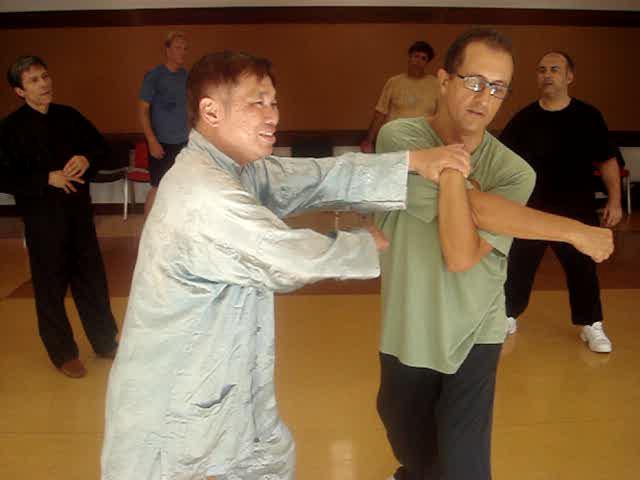
Locking Opponent's Both Arms to Strike Him -- Part 1
Locking Opponent's Both Arms to Strike Him -- Part 2
Locking Opponent's Both Arms to Strike Him -- Part 3
Locking Opponent's Both Arms to Strike Him -- Part 4
Locking Opponent's Both Arms to Strike Him -- Part 5
Locking Opponent's Both Arms to Strike Him -- Part 6
Locking Opponent's Both Arms to Strike Him -- Part 7
Locking Opponent's Both Arms to Strike Him -- Part 8
Locking Opponent's Both Arms to Strike Him -- Part 9
Locking Opponent's Both Arms to Strike Him -- Part 10
Locking Opponent's Both Arms to Strike Him -- Part 11
Locking Opponent's Both Arms to Strike Him -- Part 12
Developing Skills to Apply Techniques Effectively -- Part 1
Developing Skills to Apply Techniques Effectively -- Part 2
Developing Skills to Apply Techniques Effectively -- Part 3
Developing Skills to Apply Techniques Effectively -- Part 4
Developing Skills to Apply Techniques Effectively -- Part 5
Developing Skills to Apply Techniques Effectively -- Part 6
Developing Skills to Apply Techniques Effectively -- Part 7
Developing Skills to Apply Techniques Effectively -- Part 8
Developing Skills to Apply Techniques Effectively -- Part 9
 Developing Skills to Apply Techniques Effectively -- Part 10
Developing Skills to Apply Techniques Effectively -- Part 11
Developing Skills to Apply Techniques Effectively -- Part 12
Developing Skills to Apply Techniques Effectively -- Part 13
Keeping a Boxer at Bay as he Bounces Around -- Part 1
Keeping a Boxer at Bay as he Bounces Around -- Part 2
Keeping a Boxer at Bay as he Bounces Around -- Part 3
Keeping a Boxer at Bay as he Bounces Around -- Part 4
Keeping a Boxer at Bay as he Bounces Around -- Part 5
Keeping a Boxer at Bay as he Bounces Around -- Part 6
Keeping a Boxer at Bay as he Bounces Around -- Part 7
Keeping a Boxer at Bay as he Bounces Around -- Part 8
Keeping a Boxer at Bay as he Bounces Around -- Part 9
The Tactic of Deflect and Strike -- Part 1
The Tactic of Deflect and Strike -- Part 2
The Tactic of Deflect and Strike -- Part 3
The Tactic of Deflect and Strike -- Part 4
The Tactic of Deflect and Strike -- Part 5
The Tactic of Deflect and Strike -- Part 6
The Tactic of Deflect and Strike -- Part 7
The Tactic of Deflect and Strike -- Part 8
The Tactic of Deflect and Strike -- Part 9
The Tactic of Deflect and Strike -- Part 10
The Tactic of Deflect and Strike -- Part 11
The Tactic of Deflect and Strike -- Part 12
Guard-Hand for Defence and Attack -- Part 1
Guard-Hand for Defence and Attack -- Part 2
Guard-Hand for Defence and Attack -- Part 3
Guard-Hand for Defence and Attack -- Part 4
Guard-Hand for Defence and Attack -- Part 5
Guard-Hand for Defence and Attack -- Part 6Guard-Hand for Defence and Attack -- Part 7
Guard-Hand for Defence and Attack -- Part 8
Guard-Hand for Defence and Attack -- Part 9
Guard-Hand for Defence and Attack -- Part 10
Be Proficient in Basic Techniques before
Learning the Sophisticated -- Part 1
Be Proficient in Basic Techniques before
Learning the Sophisticated -- Part 2
Be Proficient in Basic Techniques before
Learning the Sophisticated -- Part 3
Be Proficient in Basic Techniques before Learning the Sophisticated -- Part 4
Be Proficient in Basic Techniques before Learning the Sophisticated -- Part 5
Be Proficient in Basic Techniques before Learning the Sophisticated -- Part 6
Be Proficient in Basic Techniques before Learning the Sophisticated -- Part 7
Be Proficient in Basic Techniques before Learning the Sophisticated -- Part 8
Usefulness of the Boiw-Arrow Stance -- Overview
Keep a Boxer at Bay with your Guard Hand -- Overview
In-Gate and Out-Gate in Defence -- Overview
The Tactic of Cover and Strike -- Overview
Countering at Piints 3, 2 and 1 -- Overview
Taking the Initiative to Attack a Boxer -- Overview
Covering your Opponent to Ensure Safety First -- Overview
Usefulness and Subtlety of Body Movement -- Overview
Locking Opponent's Both Arms to Strike Him -- Overview
Developing Skills to Apply Techniques Effectively -- Overview
 Keeping a Boxer at Bay as he Bounces Around
-- Overview
The Tactic of Deflect and Strike -- Overview
Guard-Hand for Defence and Attack -- Overview
Be Proficient in Basic Techniques before
Learning the Sophisticated -- Overview
Shaolin in Portugal 2010 -- Shaolin 03 Countering a Boxer at Point 2 -- Part 1
Countering a Boxer at Point 2 -- Part 2
Countering a Boxer at Point 2 -- Part 3
Countering a Boxer at Point 2 -- Part 4
Countering a Boxer at Point 2 -- Part 5
Countering a Boxer at Point 2 -- Part 6
Countering a Boxer at Point 2 -- Part 7
Countering a Boxer at Point 2 -- Part 8
Keeping Boxers Away with Guard-Hand -- Part 1
Keeping Boxers Away with Guard-Hand -- Part 2
Keeping Boxers Away with Guard-Hand -- Part 3
Keeping Boxers Away with Guard-Hand -- Part 4
Keeping Boxers Away with Guard-Hand -- Part 5
Keeping Boxers Away with Guard-Hand -- Part 6
Keeping Boxers Away with Guard-Hand -- Part 7
Keeping Boxers Away with Guard-Hand -- Part 8
Keeping Boxers Away with Guard-Hand -- Part 9
Keeping Boxers Away with Guard-Hand -- Part 10
Effectiveness of Guard-Hand in Fighting against Boxers -- Part 1
Effectiveness of Guard-Hand in Fighting against Boxers -- Part 2
 Effectiveness of Guard-Hand in Fighting against
Boxers -- Part 3
Effectiveness of Guard-Hand in Fighting against
Boxers -- Part 4
Effectiveness of Guard-Hand in Fighting against
Boxers -- Part 5
Effectiveness of Guard-Hand in Fighting against
Boxers -- Part 6
Effectiveness of Guard-Hand in Fighting against
Boxers -- Part 7
Effectiveness of Guard-Hand in Fighting against
Boxers -- Part 8
Effectiveness of Guard-Hand in Fighting against Boxers -- Part 9
How would You Counter a Boxer Raining Blows on You? -- Part 1
How would You Counter a Boxer Raining Blows on You? -- Part 2
How would You Counter a Boxer Raining Blows on You? -- Part 3
How would You Counter a Boxer Raining Blows
on You? -- Part 4
How would You Counter a Boxer Raining Blows
on You? -- Part 5
How would You Counter a Boxer Raining Blows
on You? -- Part 6
How would You Counter a Boxer Raining Blows
on You? -- Part 7
How would You Counter a Boxer Raining Blows
on You? -- Part 8
How would You Counter a Boxer Raining Blows
on You? -- Part 9
First we Need to Understand the Opponent -- Part 1
First we Need to Understand the Opponent -- Part 1
First we Need to Understand the Opponent -- Part 2
First we Need to Understand the Opponent -- Part 3
First we Need to Understand the Opponent -- Part 4
First we Need to Understand the Opponent -- Part 5
First we Need to Understand the Opponent -- Part 6
First we Need to Understand the Opponent -- Part 7
First we Need to Understand the Opponent -- Part 8
Technical Speed of Shaolin over Boxing -- Part 1
Technical Speed of Shaolin over Boxing -- Part 2
Technical Speed of Shaolin over Boxing -- Part 3
Technical Speed of Shaolin over Boxing -- Part 4
Technical Speed of Shaolin over Boxing -- Part 5
 Technical Speed of Shaolin over Boxing -- Part 6
Technical Speed of Shaolin over Boxing -- Part 7
Technical Speed of Shaolin over Boxing -- Part 8
Technical Speed of Shaolin over Boxing -- Part 9
Covering Opponent and Striking his Vital Points -- Part 1
Covering Opponent and Striking his Vital Points -- Part 2
Covering Opponent and Striking his Vital Points -- Part 3
Covering Opponent and Striking his Vital Points -- Part 4
Covering Opponent and Striking his Vital Points -- Part 5
Covering Opponent and Striking his Vital Points -- Part 6
Covering Opponent and Striking his Vital Points -- Part 7
Covering Opponent and Striking his Vital Points -- Part 8
Covering Opponent and Striking his Vital Points -- Part 9
How would You Counter a Boxer's Hooks -- Part 1
How would You Counter a Boxer's Hooks -- Part 2
How would You Counter a Boxer's Hooks -- Part 3
How would You Counter a Boxer's Hooks -- Part 4
How would You Counter a Boxer's Hooks -- Part 5
How would You Counter a Boxer's Hooks -- Part 6
How would You Counter a Boxer's Hooks -- Part 7
How would You Counter a Boxer's Hooks -- Part 8
The Amazing Technique of Cross-Road Hook-Hand -- Part 1
The Amazing Technique of Cross-Road Hook-Hand -- Part 2
The Amazing Technique of Cross-Road Hook-Hand -- Part 3
The Amazing Technique of Cross-Road Hook-Hand -- Part 4
The Amazing Technique of Cross-Road Hook-Hand -- Part 5
The Amazing Technique of Cross-Road Hook-Hand -- Part 6
The Amazing Technique of Cross-Road Hook-Hand -- Part 7
The Amazing Technique of Cross-Road Hook-Hand -- Part 8
The Amazing Technique of Cross-Road Hook-Hand -- Part 9
 The Amazing Technique of Cross-Road Hook-Hand
-- Part 10
Boxers have No Techniques to Defend against Felling
Attacks -- Part 1
Boxers have No Techniques to Defend against Felling
Attacks -- Part 2
Boxers have No Techniques to Defend against Felling
Attacks -- Part 3
Boxers have No Techniques to Defend against Felling
Attacks -- Part 4
Boxers have No Techniques to Defend against Felling
Attacks -- Part 5
Boxers have No Techniques to Defend against Felling Attacks -- Part 6
Boxers have No Techniques to Defend against Felling Attacks -- Part 7
Boxers have No Techniques to Defend against Felling Attacks -- Part 8
Boxers have No Techniques to Defend against Felling Attacks -- Part 9
White Monkey Holds Branch against the Undercut -- Part 1
White Monkey Holds Branch against the Undercut -- Part 2
White Monkey Holds Branch against the Undercut -- Part 3
White Monkey Holds Branch against the Undercut -- Part 4
White Monkey Holds Branch against the Undercut -- Part 5
White Monkey Holds Branch against the Undercut -- Part 6
White Monkey Holds Branch against the Undercut -- Part 7
White Monkey Holds Branch against the Undercut -- Part 8
White Monkey Holds Branch against the Undercut -- Part 9
White Monkey Holds Branch against the Undercut -- Part 10
White Monkey Holds Branch against the Undercut -- Part 11
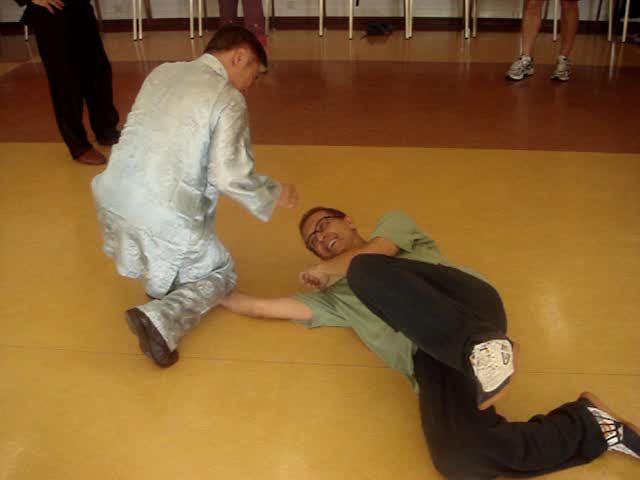
Combat Training is injury-Free and a Lot of Fun -- Part 1
Combat Training is injury-Free and a Lot of Fun -- Part 2
Combat Training is injury-Free and a Lot of Fun -- Part 3
Combat Training is injury-Free and a Lot of Fun -- Part 4
Combat Training is injury-Free and a Lot of Fun -- Part 5
Combat Training is injury-Free and a Lot of Fun -- Part 6
Combat Training is injury-Free and a Lot of Fun -- Part 7
Combat Training is injury-Free and a Lot of Fun -- Part 8
Combat Training is injury-Free and a Lot of Fun -- Part 9
 Countering a Boxer at Point 2 -- Overview
Keeping Boxers Away with Guard-Hand -- Overview
Effectiveness of Guard-Hand in Fighting against
Boxers -- Overview (New)
Effectiveness of Guard-Hand in Fighting against
Boxers -- Overview
How would You Counter a Boxer Raining Blows
on You? -- Overview
First we Need to Understand the Opponent -- Overview
Technical Speed of Shaolin over Boxing -- Overview
Covering Opponent and Striking his Vital Points -- Overview
How would You Counter a Boxer's Hooks -- Overview
The Amazing Technique of Cross-Road Hook-Hand -- Overview
Boxers have No Techniques to Defend against
Felling Attacks -- Overview
White Monkey Holds Branch against the
Undercut -- Overview
Combat Training is injury-Free and a Lot of Fun
-- Overview