VIDEO CLIPS 6j
Praying Mantis Kungfu (Cont)
 Praying Mantis Kungfu -- Praying Mantis 02
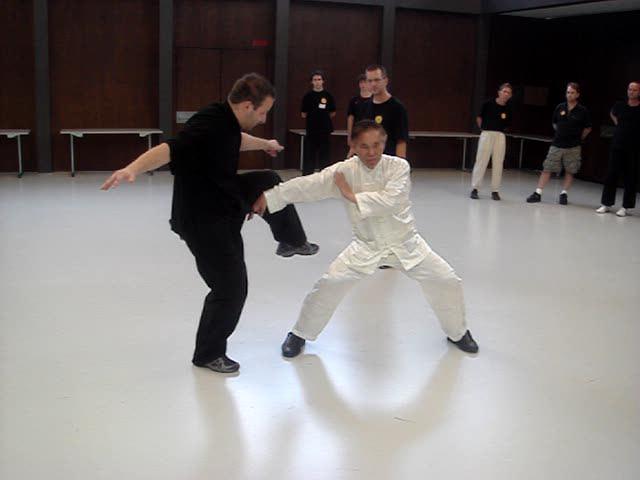
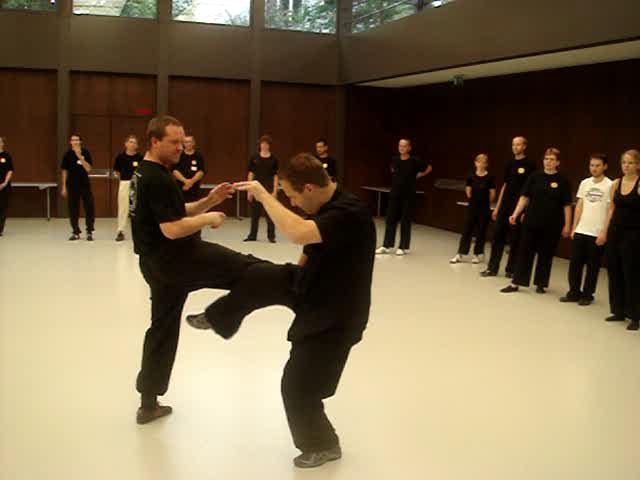
Praying Mantis Kungfu is Famous for Kicks -- Overview
Praying Mantis Kungfu -- Praying Mantis 02
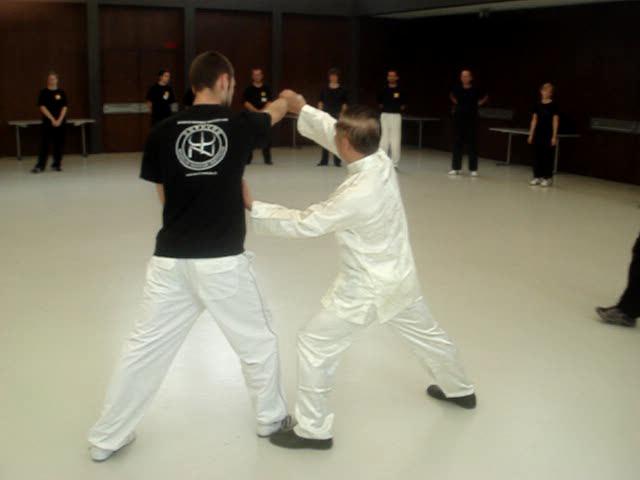
Praying Mantis Kungfu is Famous for Kicks -- OverviewGripping Techniques in Double Fists -- Overview
Short Strike in Seven-Star Turn Cart -- Overview
Famous Techniques and Tactics from the Past -- Overview
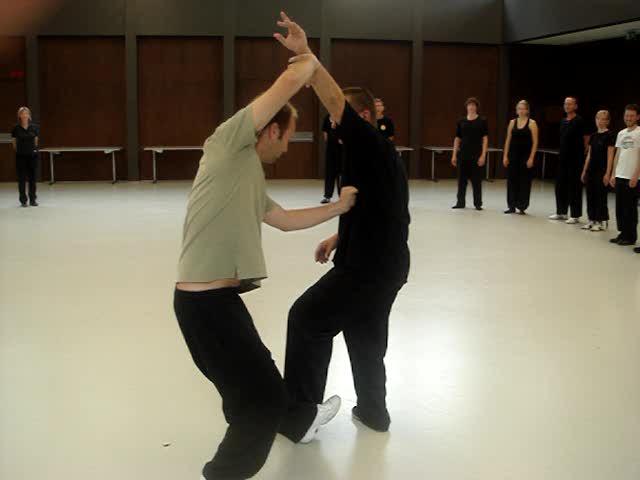
Counters against Sweeping Kicks and Charging
Attacks -- Overview
Functions and Evolution of Seven-Star Step -- Overview
Cotton Palm and /distract Trick -- Overview
Cotton Palm, Bosom Fist and Mantis Hook -- Overview
Praying Mantis Kungfu is Famous for Kicks -- Part 1
Praying Mantis Kungfu is Famous for Kicks -- Part 2
Praying Mantis Kungfu is Famous for Kicks -- Part 3
Praying Mantis Kungfu is Famous for Kicks -- Part 4
Praying Mantis Kungfu is Famous for Kicks -- Part 5
Praying Mantis Kungfu is Famous for Kicks -- Part 6
Praying Mantis Kungfu is Famous for Kicks -- Part 7
Praying Mantis Kungfu is Famous for Kicks -- Part 8
Gripping Techniques in Double Fists -- Part 1
Gripping Techniques in Double Fists -- Part 2
Gripping Techniques in Double Fists -- Part 3
Gripping Techniques in Double Fists -- Part 4
Gripping Techniques in Double Fists -- Part 5
Gripping Techniques in Double Fists -- Part 6
Gripping Techniques in Double Fists -- Part 7
Gripping Techniques in Double Fists -- Part 8
Gripping Techniques in Double Fists -- Part 9
Gripping Techniques in Double Fists -- Part 10
Gripping Techniques in Double Fists -- Part 11
Short Strike in Seven-Star Turn Cart -- Part 1
Short Strike in Seven-Star Turn Cart -- Part 2
Short Strike in Seven-Star Turn Cart -- Part 3
 Short Strike in Seven-Star Turn Cart -- Part 4
Short Strike in Seven-Star Turn Cart -- Part 5
Short Strike in Seven-Star Turn Cart -- Part 6
Short Strike in Seven-Star Turn Cart -- Part 7
Short Strike in Seven-Star Turn Cart -- Part 8
Short Strike in Seven-Star Turn Cart -- Part 9
Famous Techniques and Tactics from the Past -- Part 1
Famous Techniques and Tactics from the Past -- Part 2
Famous Techniques and Tactics from the Past -- Part 3
Famous Techniques and Tactics from the Past -- Part 4
Famous Techniques and Tactics from the Past -- Part 5
Famous Techniques and Tactics from the Past -- Part 6
Famous Techniques and Tactics from the Past -- Part 7
Famous Techniques and Tactics from the Past -- Part 8
Counters against Sweeping Kicks and Charging Attacks -- Part 1
Counters against Sweeping Kicks and Charging Attacks -- Part 2
Counters against Sweeping Kicks and Charging Attacks -- Part 3
Counters against Sweeping Kicks and Charging Attacks -- Part 4
Counters against Sweeping Kicks and Charging Attacks -- Part 5
Counters against Sweeping Kicks and Charging Attacks -- Part 6
Counters against Sweeping Kicks and Charging Attacks -- Part 7
Counters against Sweeping Kicks and Charging Attacks -- Part 8
Counters against Sweeping Kicks and Charging Attacks -- Part 9
Functions and Evolution of Seven-Star Step -- Part 1
Functions and Evolution of Seven-Star Step -- Part 2
Functions and Evolution of Seven-Star Step -- Part 3
Functions and Evolution of Seven-Star Step -- Part 4
Functions and Evolution of Seven-Star Step -- Part 5
Functions and Evolution of Seven-Star Step -- Part 6
Functions and Evolution of Seven-Star Step -- Part 7
 Functions and Evolution of Seven-Star Step -- Part 8
Functions and Evolution of Seven-Star Step -- Part 9
Functions and Evolution of Seven-Star Step -- Part 10
Cotton Palm and /distract Trick -- Part 1
Cotton Palm and /distract Trick -- Part 2
Cotton Palm and /distract Trick -- Part 3
Cotton Palm and /distract Trick -- Part 4
Cotton Palm and /distract Trick -- Part 5
Cotton Palm and /distract Trick -- Part 6
Cotton Palm and /distract Trick -- Part 7
Cotton Palm and /distract Trick -- Part 8
Cotton Palm and /distract Trick -- Part 9
Cotton Palm, Bosom Fist and Mantis Hook -- Part 1
Cotton Palm, Bosom Fist and Mantis Hook -- Part 2
Cotton Palm, Bosom Fist and Mantis Hook -- Part 3
Cotton Palm, Bosom Fist and Mantis Hook -- Part 4
Cotton Palm, Bosom Fist and Mantis Hook -- Part 5
Cotton Palm, Bosom Fist and Mantis Hook -- Part 6
Cotton Palm, Bosom Fist and Mantis Hook -- Part 7
Cotton Palm, Bosom Fist and Mantis Hook -- Part 8
Cotton Palm, Bosom Fist and Mantis Hook -- Part 9
Cotton Palm, Bosom Fist and Mantis Hook -- Part 10
Cotton Palm, Bosom Fist and Mantis Hook -- Part 11
Cotton Palm, Bosom Fist and Mantis Hook -- Part 12
Praying Mantis Kungfu -- Praying Mantis 03
Which Pattern can be Used against any Kicks? -- OverviewJust One Pattern against any Boxcers' Attacks! -- Overview
Excellent Tactics against any Kicks -- Overview
Excellent Techniques against Kick-Boxers and
Taekwondo Exponents-- Overview
Counters against Typical Muay Thai Attacks -- Overview
Strike from Bosom against the Shoot -- Overview
Which Pattern can be Used against any Kicks? -- Part 1
Which Pattern can be Used against any Kicks? -- Part 2
Which Pattern can be Used against any Kicks? -- Part 3
Which Pattern can be Used against any Kicks? -- Part 4
Which Pattern can be Used against any Kicks? -- Part 5
Which Pattern can be Used against any Kicks? -- Part 6
Which Pattern can be Used against any Kicks? -- Part 7
Which Pattern can be Used against any Kicks? -- Part 8
Which Pattern can be Used against any Kicks? -- Part 9
Which Pattern can be Used against any Kicks? -- Part 10
Which Pattern can be Used against any Kicks? -- Part 11
Which Pattern can be Used against any Kicks? -- Part 12
Just One Pattern against any Boxcers' Attacks -- Part 1
Just One Pattern against any Boxcers' Attacks -- Part 2
Just One Pattern against any Boxcers' Attacks -- Part 3
Just One Pattern against any Boxcers' Attacks -- Part 4
Just One Pattern against any Boxcers' Attacks -- Part 5
Just One Pattern against any Boxcers' Attacks -- Part 6
Just One Pattern against any Boxcers' Attacks -- Part 7
Just One Pattern against any Boxcers' Attacks -- Part 8
Just One Pattern against any Boxcers' Attacks -- Part 9
Just One Pattern against any Boxcers' Attacks -- Part 10
Just One Pattern against any Boxcers' Attacks -- Part 11
Just One Pattern against any Boxcers' Attacks -- Part 12
 Just One Pattern against any Boxcers' Attacks -- Part 13
Excellent Tactics against any Kicks -- Part 1
Excellent Tactics against any Kicks -- Part 2
Excellent Tactics against any Kicks -- Part 3
Excellent Tactics against any Kicks -- Part 4
Excellent Tactics against any Kicks -- Part 5
Excellent Tactics against any Kicks -- Part 6
Excellent Tactics against any Kicks -- Part 7
Excellent Tactics against any Kicks -- Part 8
Excellent Tactics against any Kicks -- Part 9
Excellent Techniques against Kick-Boxers and Taekwondo Exponents -- Part 1
Excellent Techniques against Kick-Boxers and Taekwondo Exponents -- Part 2
Excellent Techniques against Kick-Boxers and Taekwondo Exponents -- Part 3
Excellent Techniques against Kick-Boxers and Taekwondo Exponents -- Part 4
Excellent Techniques against Kick-Boxers and Taekwondo Exponents -- Part 5
Excellent Techniques against Kick-Boxers and Taekwondo Exponents -- Part 6
Excellent Techniques against Kick-Boxers and Taekwondo Exponents -- Part 7
Excellent Techniques against Kick-Boxers and Taekwondo Exponents -- Part 8
Excellent Techniques against Kick-Boxers and Taekwondo Exponents -- Part 9
Counters against Typical Muay Thai Attacks -- Part 1
Counters against Typical Muay Thai Attacks -- Part 2
Counters against Typical Muay Thai Attacks -- Part 3
Counters against Typical Muay Thai Attacks -- Part 4
Counters against Typical Muay Thai Attacks -- Part 5
Counters against Typical Muay Thai Attacks -- Part 6
Counters against Typical Muay Thai Attacks -- Part 7
Counters against Typical Muay Thai Attacks -- Part 8
Counters against Typical Muay Thai Attacks -- Part 9
Counters against Typical Muay Thai Attacks -- Part 10
Strike from Bosom against the Shoot -- Part 1
 Strike from Bosom against the Shoot -- Part 2
Strike from Bosom against the Shoot -- Part 3
Strike from Bosom against the Shoot -- Part 4
Strike from Bosom against the Shoot -- Part 5
Strike from Bosom against the Shoot -- Part 6
Strike from Bosom against the Shoot -- Part 7
Strike from Bosom against the Shoot -- Part 8
Strike from Bosom against the Shoot -- Part 9